Racking Assembly Setting

Description
The Racking Assembly Setting feature empowers you to add, edit, and store settings for the racking assembler tool. This functionality allows you to configure settings to determine which clamp families will be automatically placed, if any, streamlining your racking assembly processes.

Step-by-Step Guide
- Access the Tool: Click on the "Racking Assembly Setting" icon in the Assembly section.
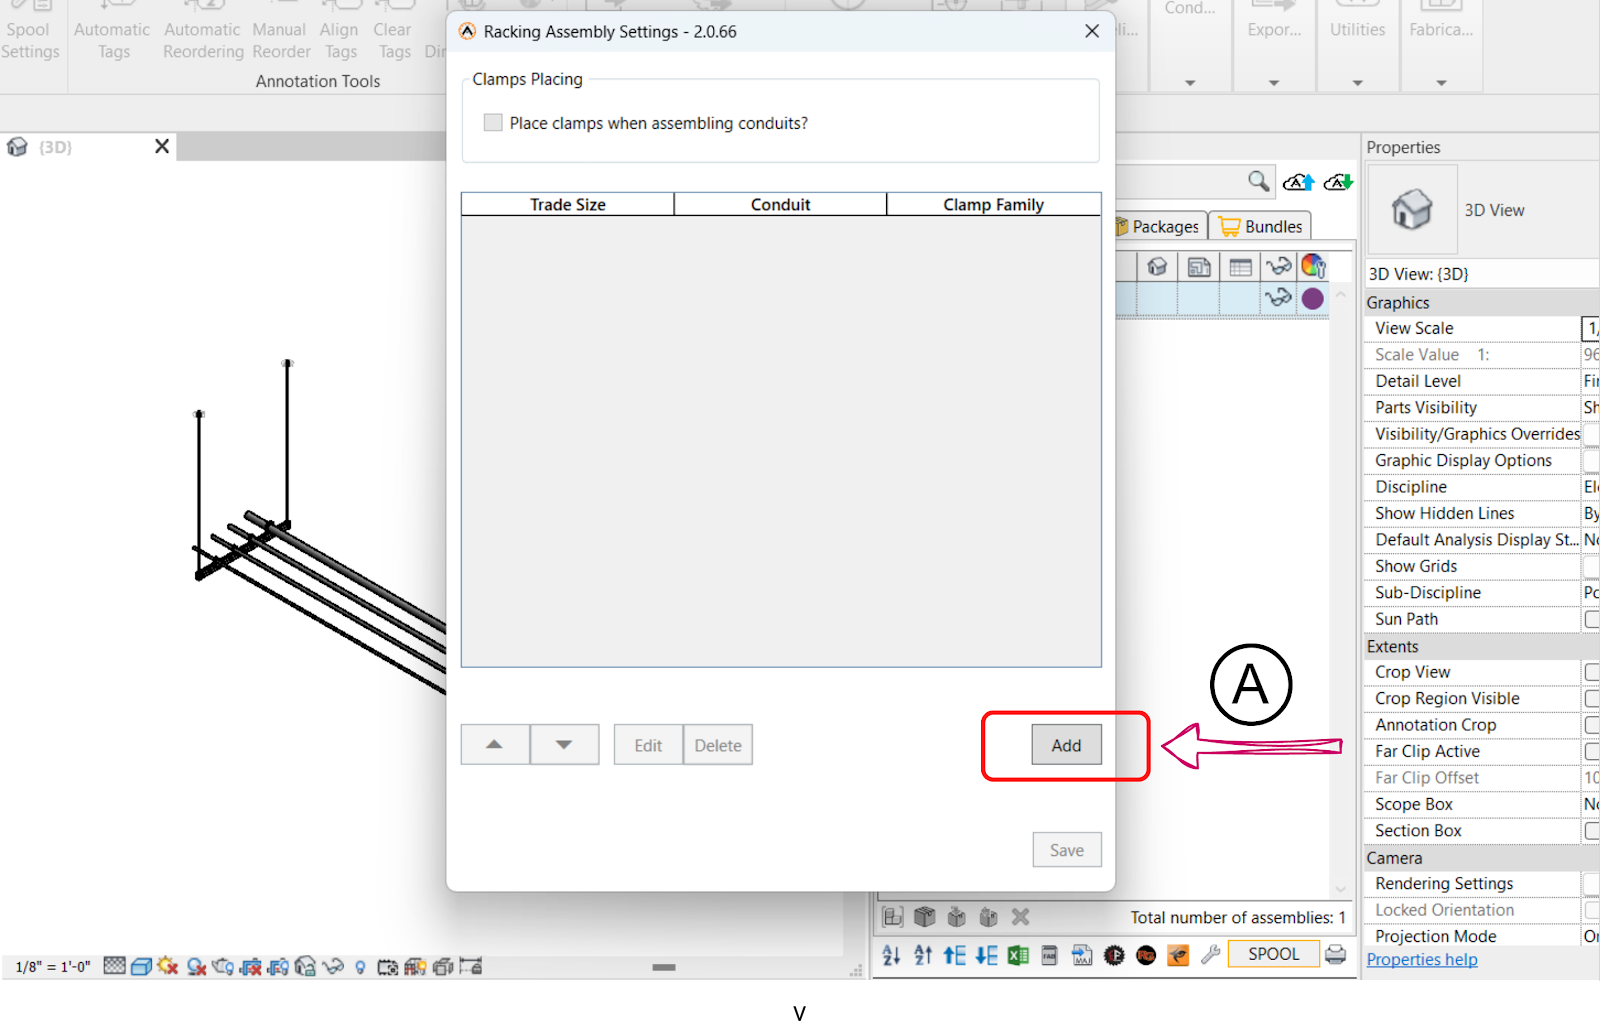
- If this is your first time adding a setting, you'll encounter an empty view with the only option being to add a new rule.
- Add Rule: Click on the "Add" button (A) to create a rule for the trade size value , After clicking ,another window will be open where you can add your rules
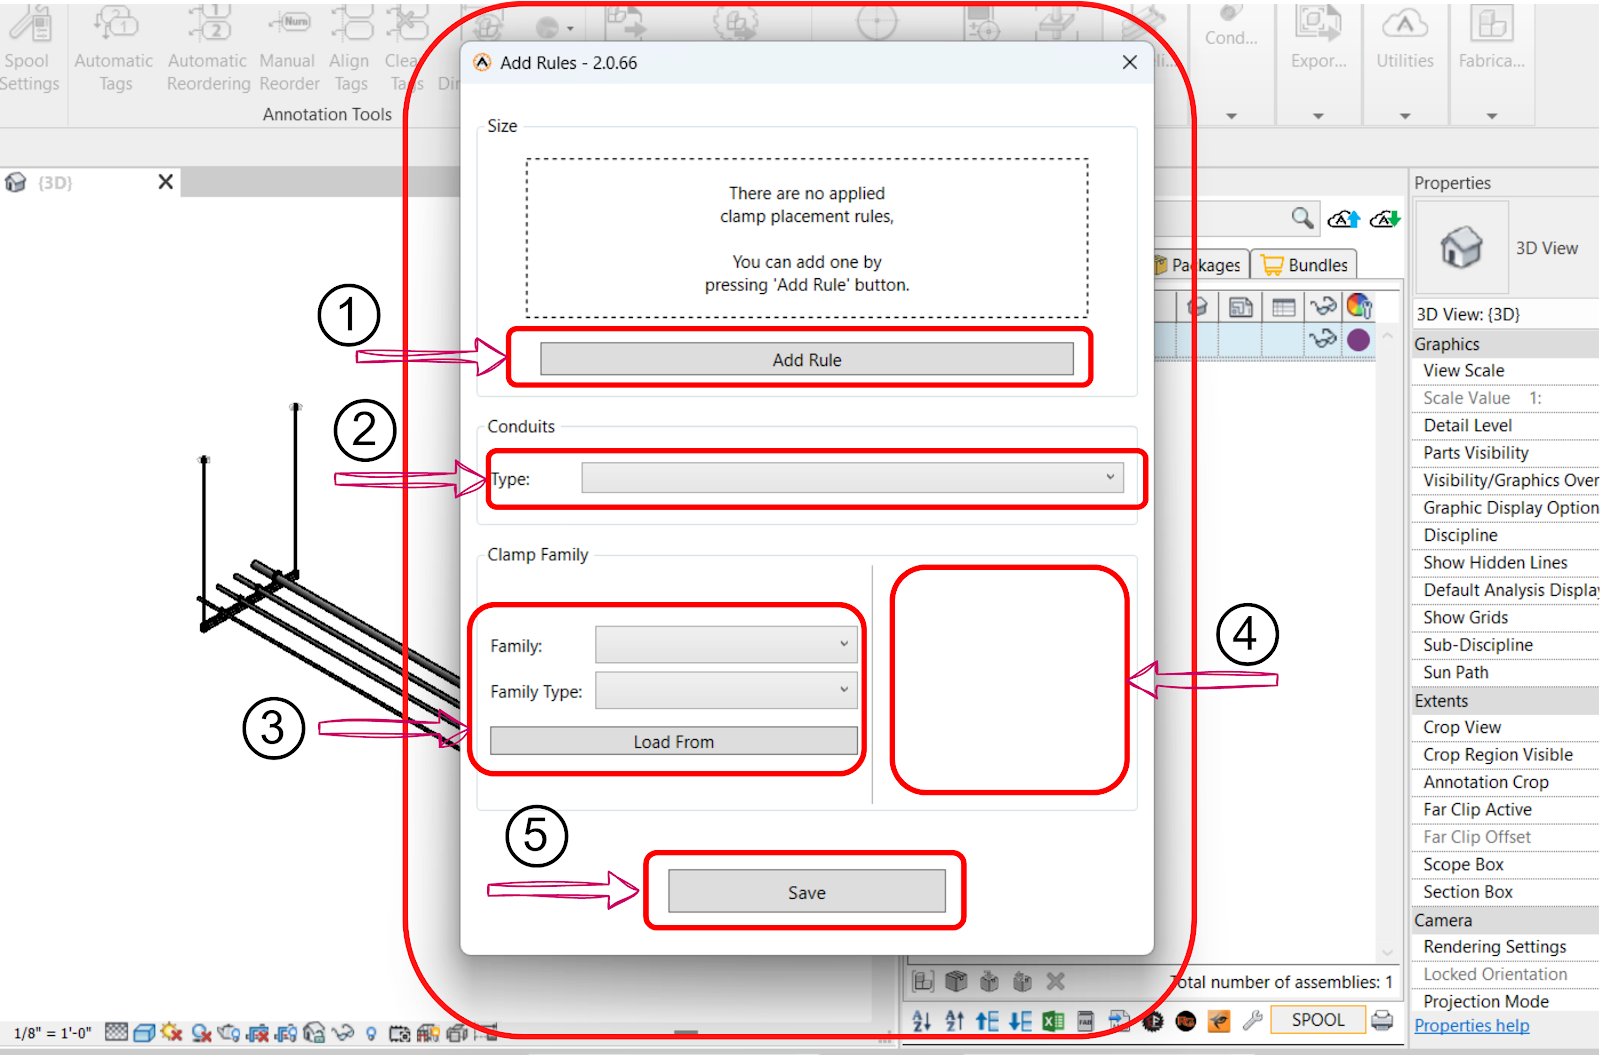
- Add Rule: Click on the "Add Rule" button to create a rule for the trade size value.
- Conduits Type: Use the dropdown button to choose from available conduit types.
- Clamp Family & Type: These two dropdown menus enable you to select from various clamp families and types. You can also load from .rfa files if needed.
- View the Clamp: This area displays the 3D shape of the clamp, providing a visual understanding of the component.
- Save Setting: Click the "Save Setting" button to save the rule setting and add it to your configuration
After Adding your Rule , you will be pushed back to the setting screen , where it contains:
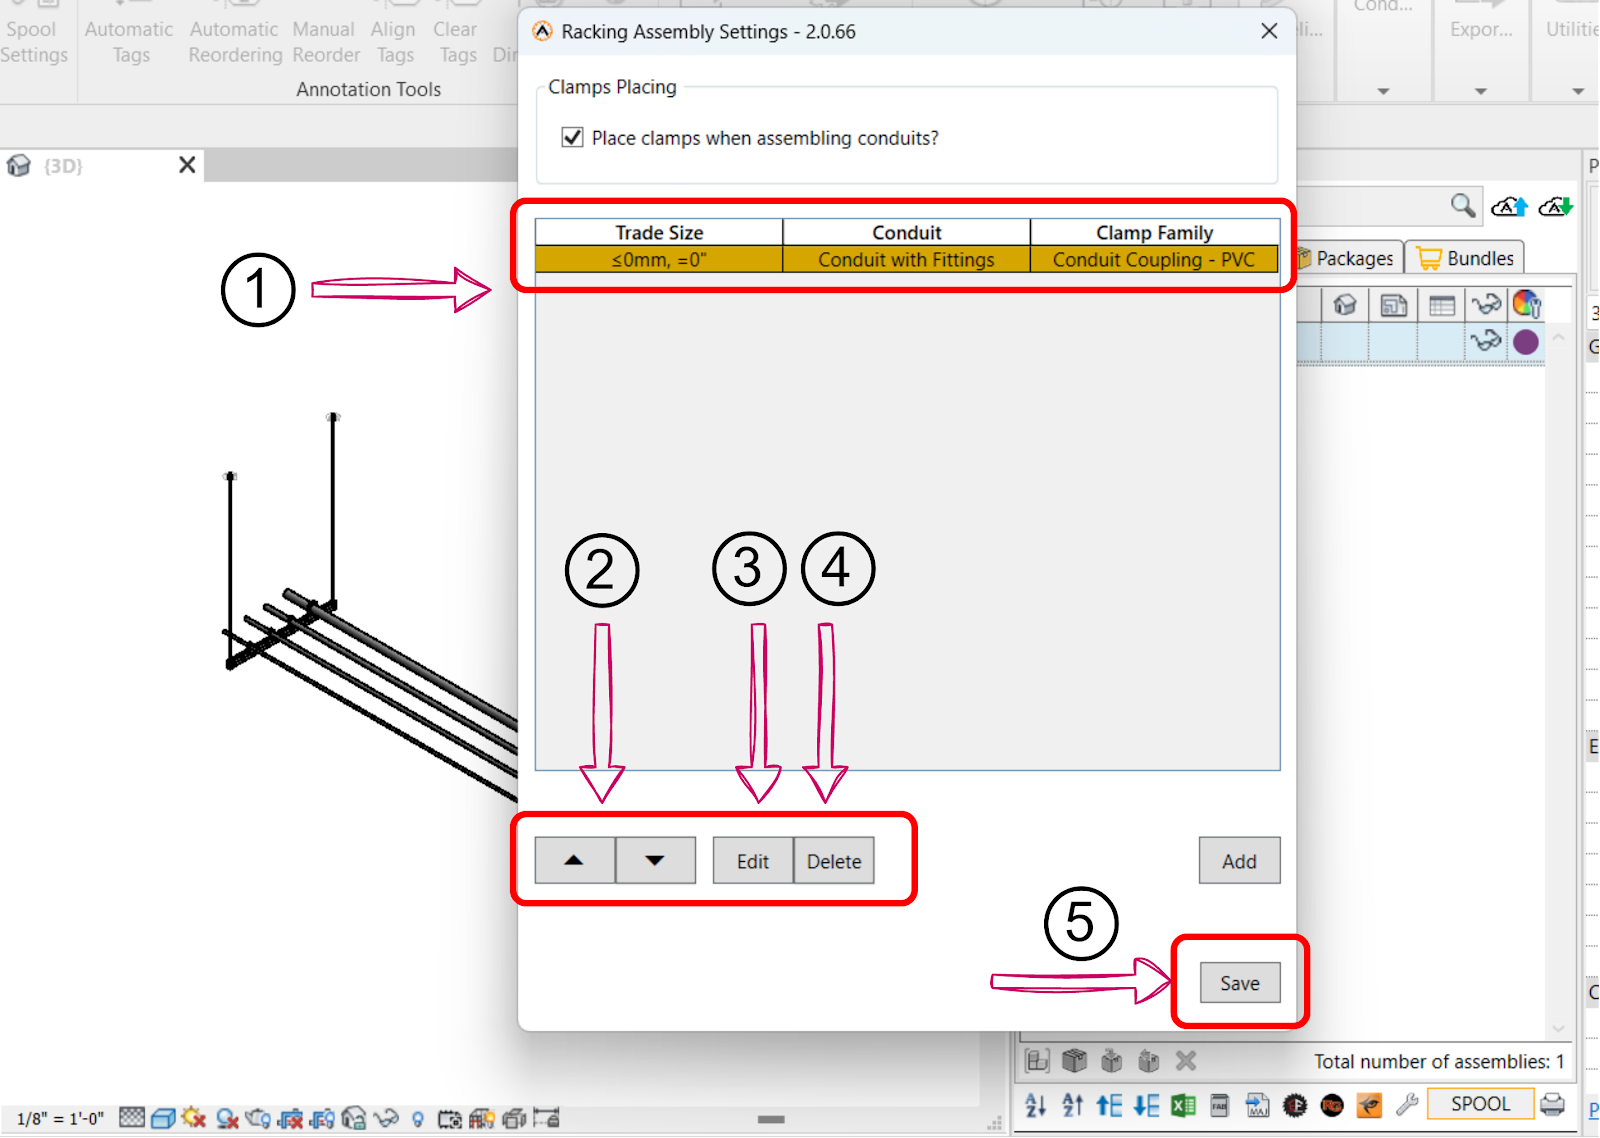
- List of Rules Added (1): This view displays a list of the saved rules.
- Up/Down Buttons (2): These buttons allow you to reorder the rules as needed.
- Edit Button (3): When you select a rule, the "Edit" button becomes active. Click on it to modify the rule according to your preferences.
- Delete Button (4): If you wish to delete a rule, select it, and you'll notice that the "Delete" button becomes active. Once deleted, the action cannot be undone.
- Save Button (5): When you're finished, click the "Save" button to confirm your rule settings, once saved the sava button will become inactive, indicating that all settings are saved.
Created with the Personal Edition of HelpNDoc: Leave the tedious WinHelp HLP to CHM conversion process behind with HelpNDoc