Place Hangers

Description
This feature allows you to put hangers on selected fabrication parts, following your predefined settings. You can place fabrication part hangers onto chosen fabrication components, either based on specified spacing or by specifying the number of hangers per element. This simplifies the process of positioning hangers precisely where you need them in your project.


Step-by-Step Guide
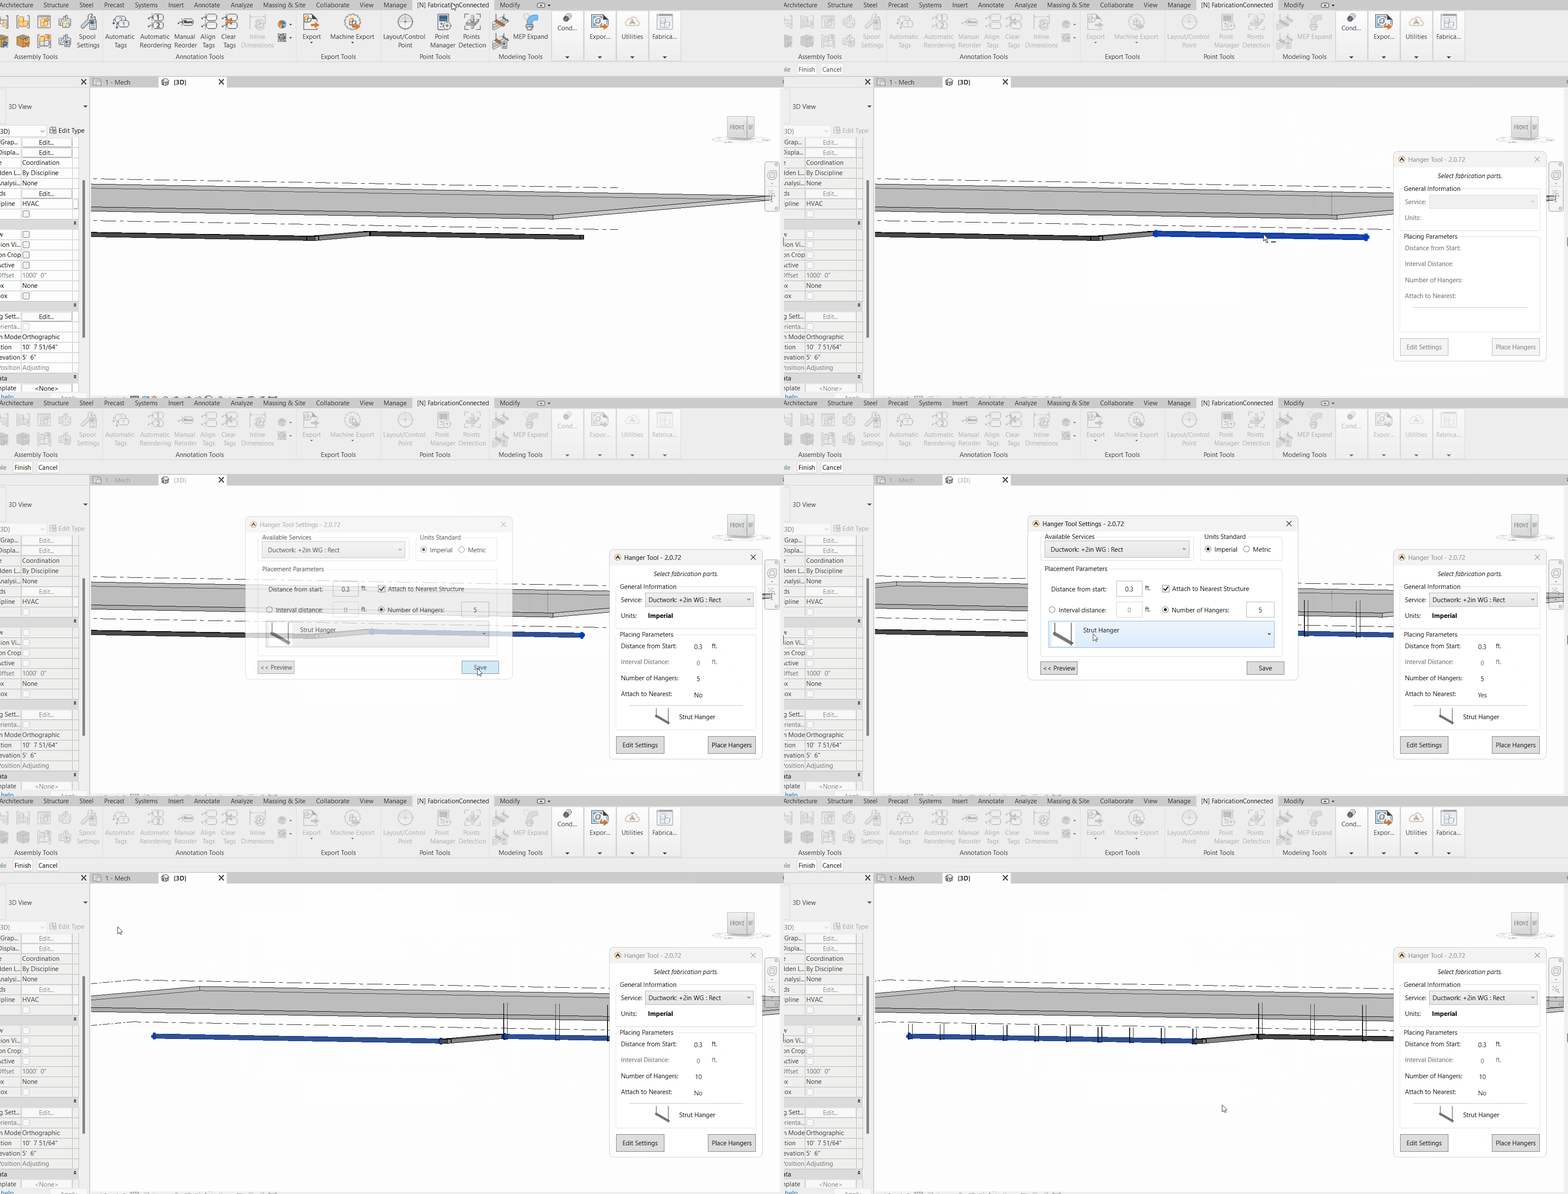
- Click Place Hanger Icon: Click on "Place Hangers" tool icon
 in the toolbar, a hanger tools window will open, initially without any information.
 - Select Your Desired Part: Within the project view, choose the fabrication part you want to add hangers to.
- Click Finish Button: Once you've made your selection, click the "Finish" button.
- View Information: After clicking "Finish," the hanger tools window will populate with information specific to the part you selected. This information will include details about the hanger placement on the chosen part.

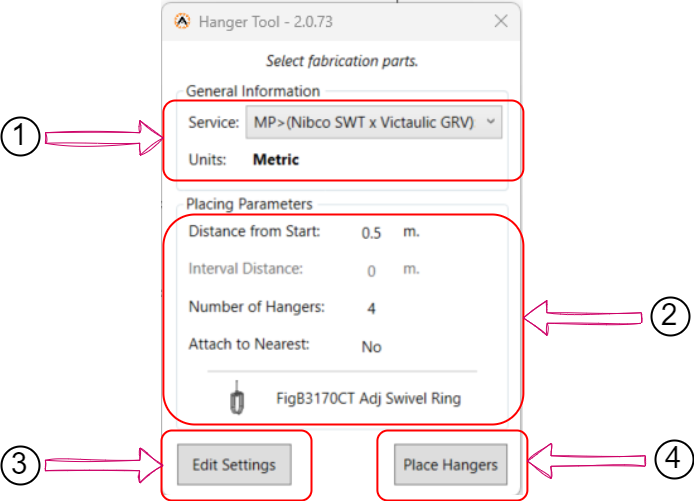
- General Information: This section provides you with essential information about the selected fabrication part, including details about its service category and units.
- Placing Parameters: Here, you can review the hanger settings that you added or set before. These settings determine how the hangers will be placed on the selected fabrication part.
- Edit Setting: If you wish to make changes to your hanger settings, click on "Edit Settings." This allows you to adjust the placement parameters to suit your specific needs.
- Place Hangers: To actually place the hangers on the selected fabrication part according to the configured settings, click on "Place Hangers."
Created with the Personal Edition of HelpNDoc: Produce electronic books easily