Hanger Settings

Description
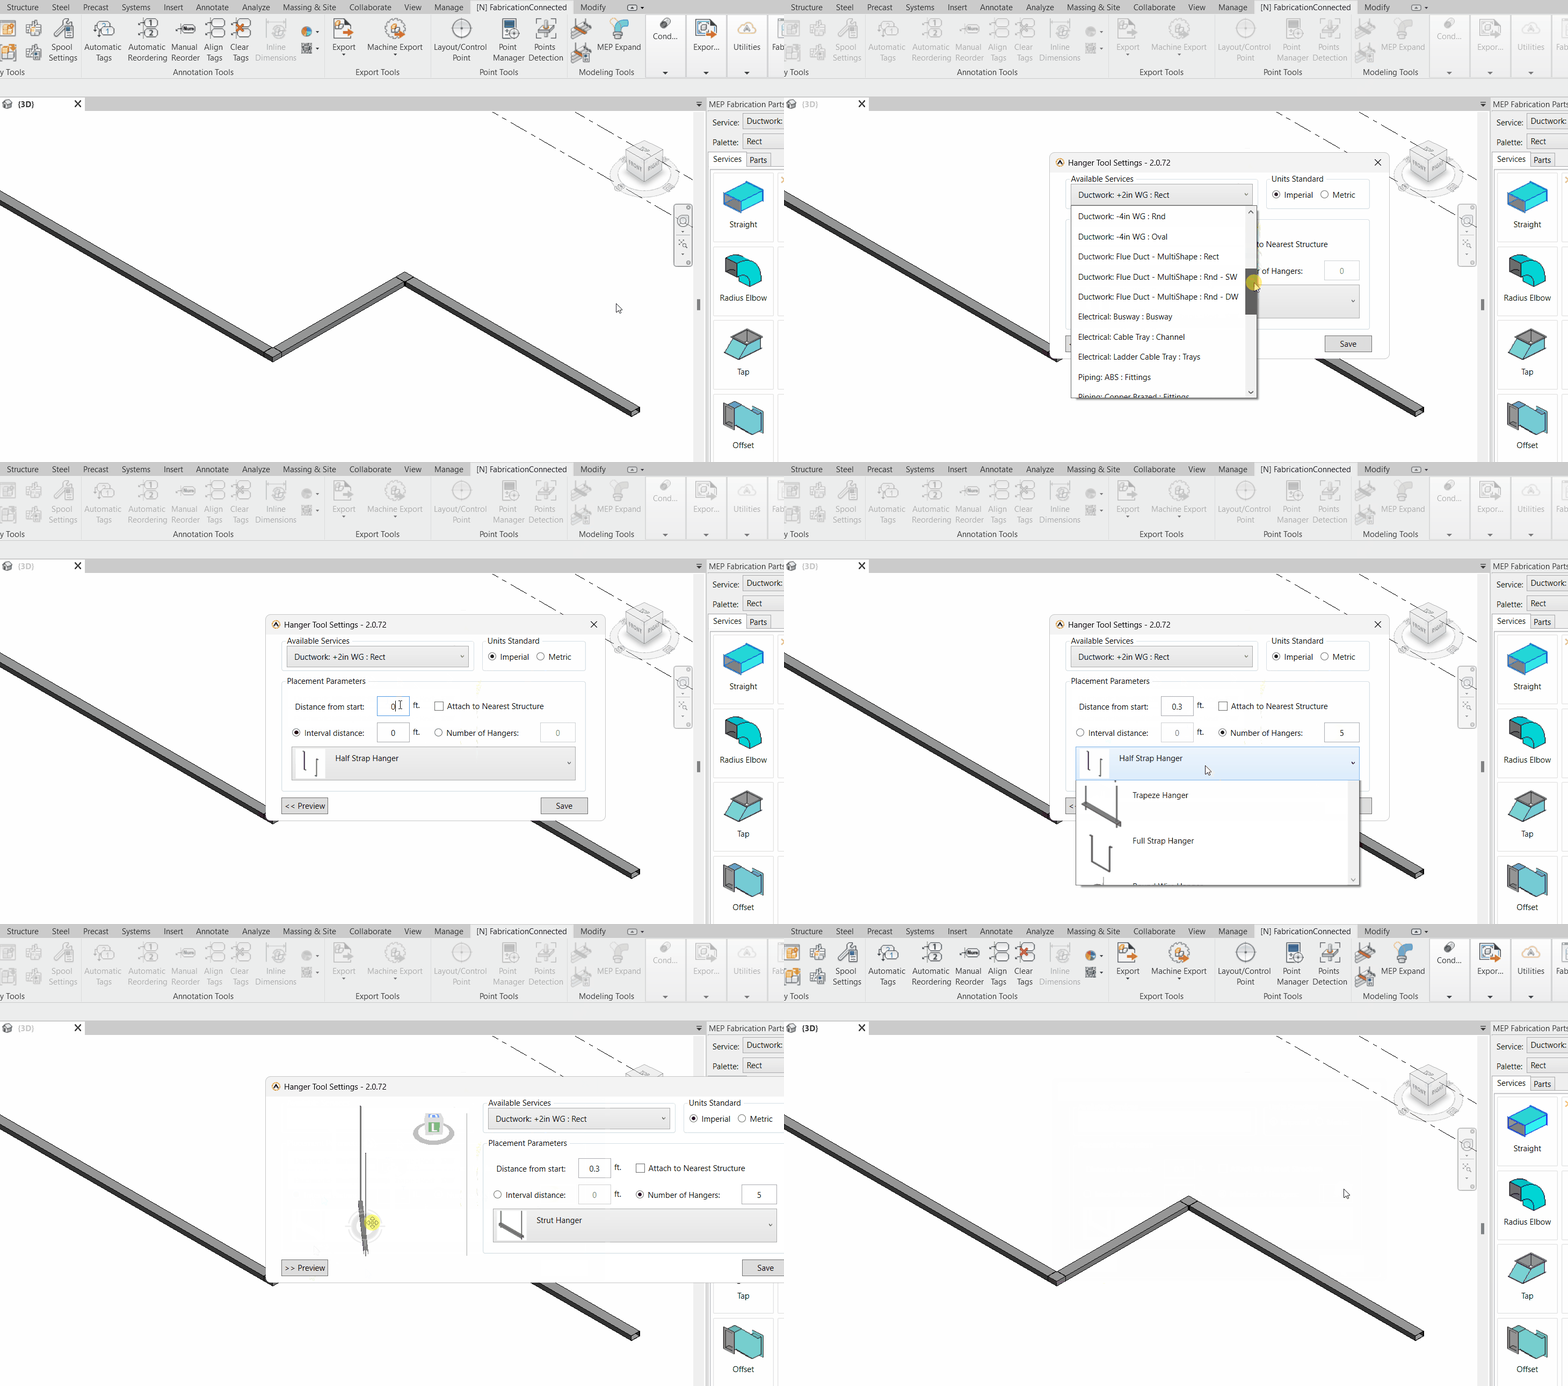
This feature allows you to adjust the settings for fabrication part hangers in a hassle-free manner. By opening the settings window, you can modify how fabrication part hangers are placed, tailoring them to the specific needs of each fabrication part service within your model. This ensures precise and efficient placement of hangers.


Step-by-Step Guide
- Click on the "Hanger Setting" icon
 in the Fabrication Tools menu.
 - If it's your first time configuring settings, you may encounter a pop-up message stating, "This Revit file has no loaded Fabrication Services." Here, you have two options:
- Click "Yes" to load Fabrication Services if you want to proceed with the setup.
- Click "No" if you want to cancel and exit this step.
When you choose "Yes," a settings pop-up window will appear. In this window, you can customize your fabrication settings according to your project requirements.
Fabrication Settings:

- Fabrication Configuration: Clicking this button opens a tab where you can configure your fabrication settings. This is where you can setup various aspects of your fabrication work.
- Connection Indicators: By selecting this button, you can access color settings that allow you to change connection colors
- To change a specific color, click on the part you want to modify.
- A color palette pop-up will appear, letting you choose your preferred color from a selection of options.

- Fabrication Configuration: You have the option to select and load either "Revit MEP Imperial Content V2.4" or "Revit MEP Metric Content V2.3" based on your project's units.
- Fabrication Profile: Pick your preferred fabrication profile that suits your project's needs.
- Reload Configuration: Click "Reload Configuration" to update the settings. This is useful for adding unloaded services and additional parts.
- Loading Services or Parts: To load services or parts, click on the respective tab. You'll see a list of loaded and unloaded services.
- Unloaded Services: This section displays a list of all available unloaded services. To select them all, simply press "Ctrl" + "A" on your keyboard.
- Loaded Services: This column displays the services that are currently loaded into your project.
- Add / Remove Buttons:
- Add Button: To load a service, go to the unloaded service list, select the service(s) you want to load, and then click the "Add" button
 .
. - Remove Button: If you want to unload a service, simply go to the loaded services list, select the service(s) you want to remove, and then click the "Remove" button
 .
. - Save Setting: If you want to save your fabrication settings, click "OK." If not, click "Cancel" to exit without saving.
Once you've loaded and configured your fabrication settings, you can proceed by clicking on the "Hanger Setting" icon ![]() . This action will allow you to access and adjust your hanger settings within the Fabrication Tools in Revit .
. This action will allow you to access and adjust your hanger settings within the Fabrication Tools in Revit .

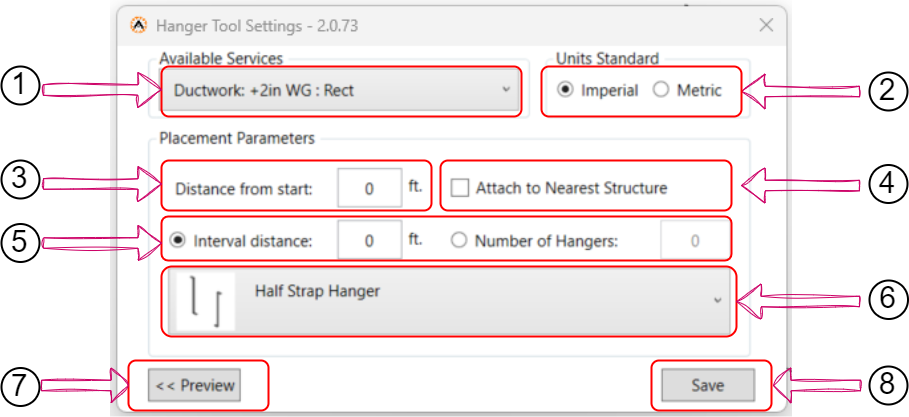
- Available Services: Choose a service from your loaded services list.
- Units Standered: Select the unit standard you prefer, whether it's imperial or metric.
- Distance from Start: Type the value you want for the distance the hanger should leave from the starting point. The unit will be based on your specified standard.
- Attach to Nearest Structure: Check this checkbox if you want the hanger to be attached to the nearest structural part.
- Distribution Method: Choose between specifying an interval distance or a specific number of hangers (Based on spacing or number of hangers per element).
- Interval Distance: If you select interval distance, you can type the distance at which a new hanger will be placed.
- Number of Hangers: If you choose to specify the number of hangers, you can define the quantity you want to place, regardless of the distance between them.
- Hanger Selection Menu: Select from various available hanger types within the menu.
- Preview: Use this feature to preview the hanger settings you've configured in a 3D view.
- Save: Click "Save" to save your settings. If not, click the close icon in the popup window to discard changes.
Created with the Personal Edition of HelpNDoc: Simplify Your Help Documentation Process with a Help Authoring Tool