Combining Assemblies
![]()
Description
The "Combine Assemblies" feature empowers you to create one assembly from multiple assemblies. It's used to merge several assemblies into a single, unified assembly. It's important to note that Revit itself cannot perform this function, as it lacks the capability to merge multiple assemblies together. This feature provides a practical solution for combining assemblies in your project.

Why Use the Combine Assemblies Feature?
- Simplify Workflow: Merging assemblies reduces steps, streamlining your work processes.
- Alignment and Clarity: It aligns components, enhancing communication and visual clarity.
- Efficiency Boost: When working on BIM projects, this feature significantly improves efficiency.
Illustrative Example
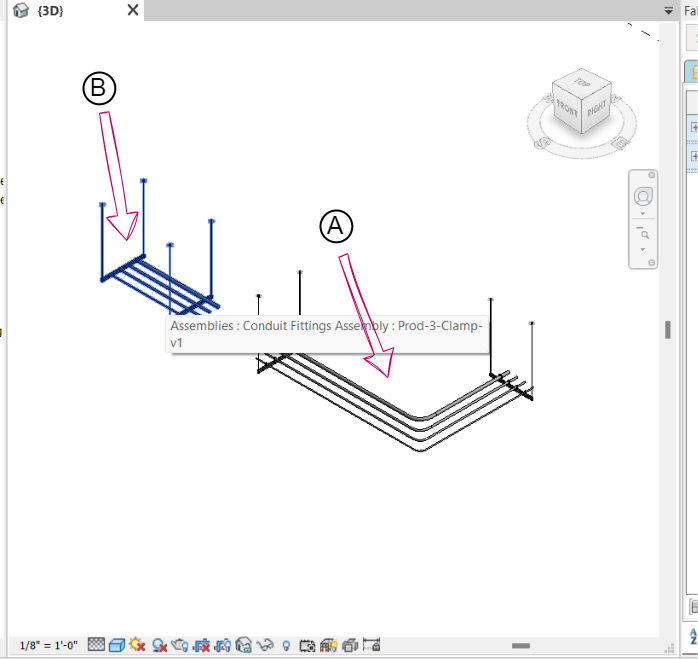
- Before Combining the Assemblies: we have two separate assemblies labeled as (A) and (B). Hovering over any assembly group confirms that they are not grouped into a single assembly.
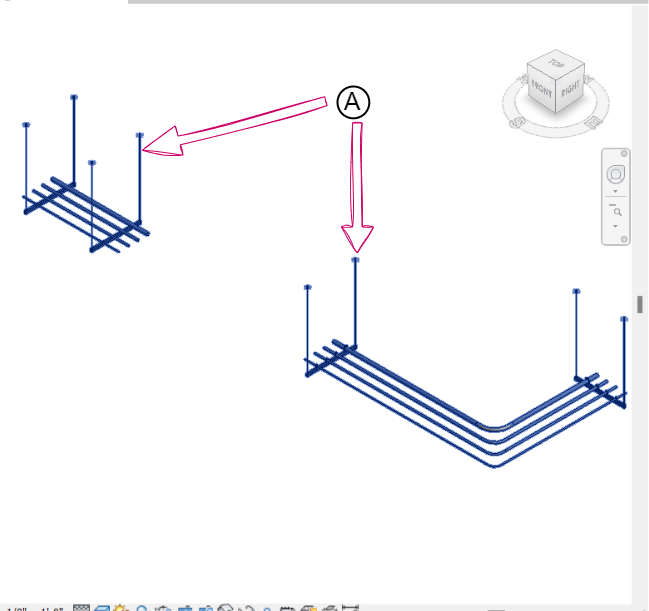
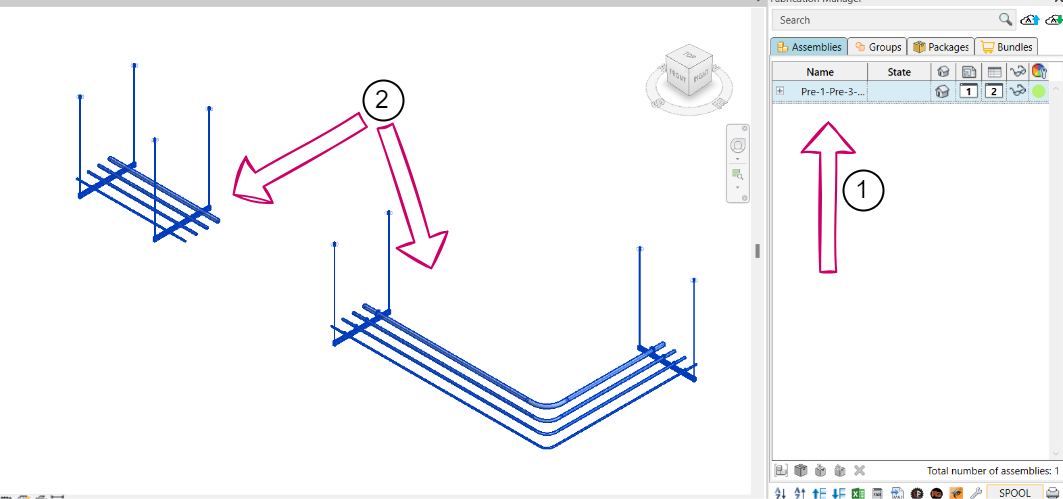
- After combining the assemblies (A): you'll observe that they have transformed into a single, unified assembly. Hovering over any part of this assembly, you'll notice that the previously separate assemblies have turned blue, indicating their successful combination.
Step-by-Step Guide
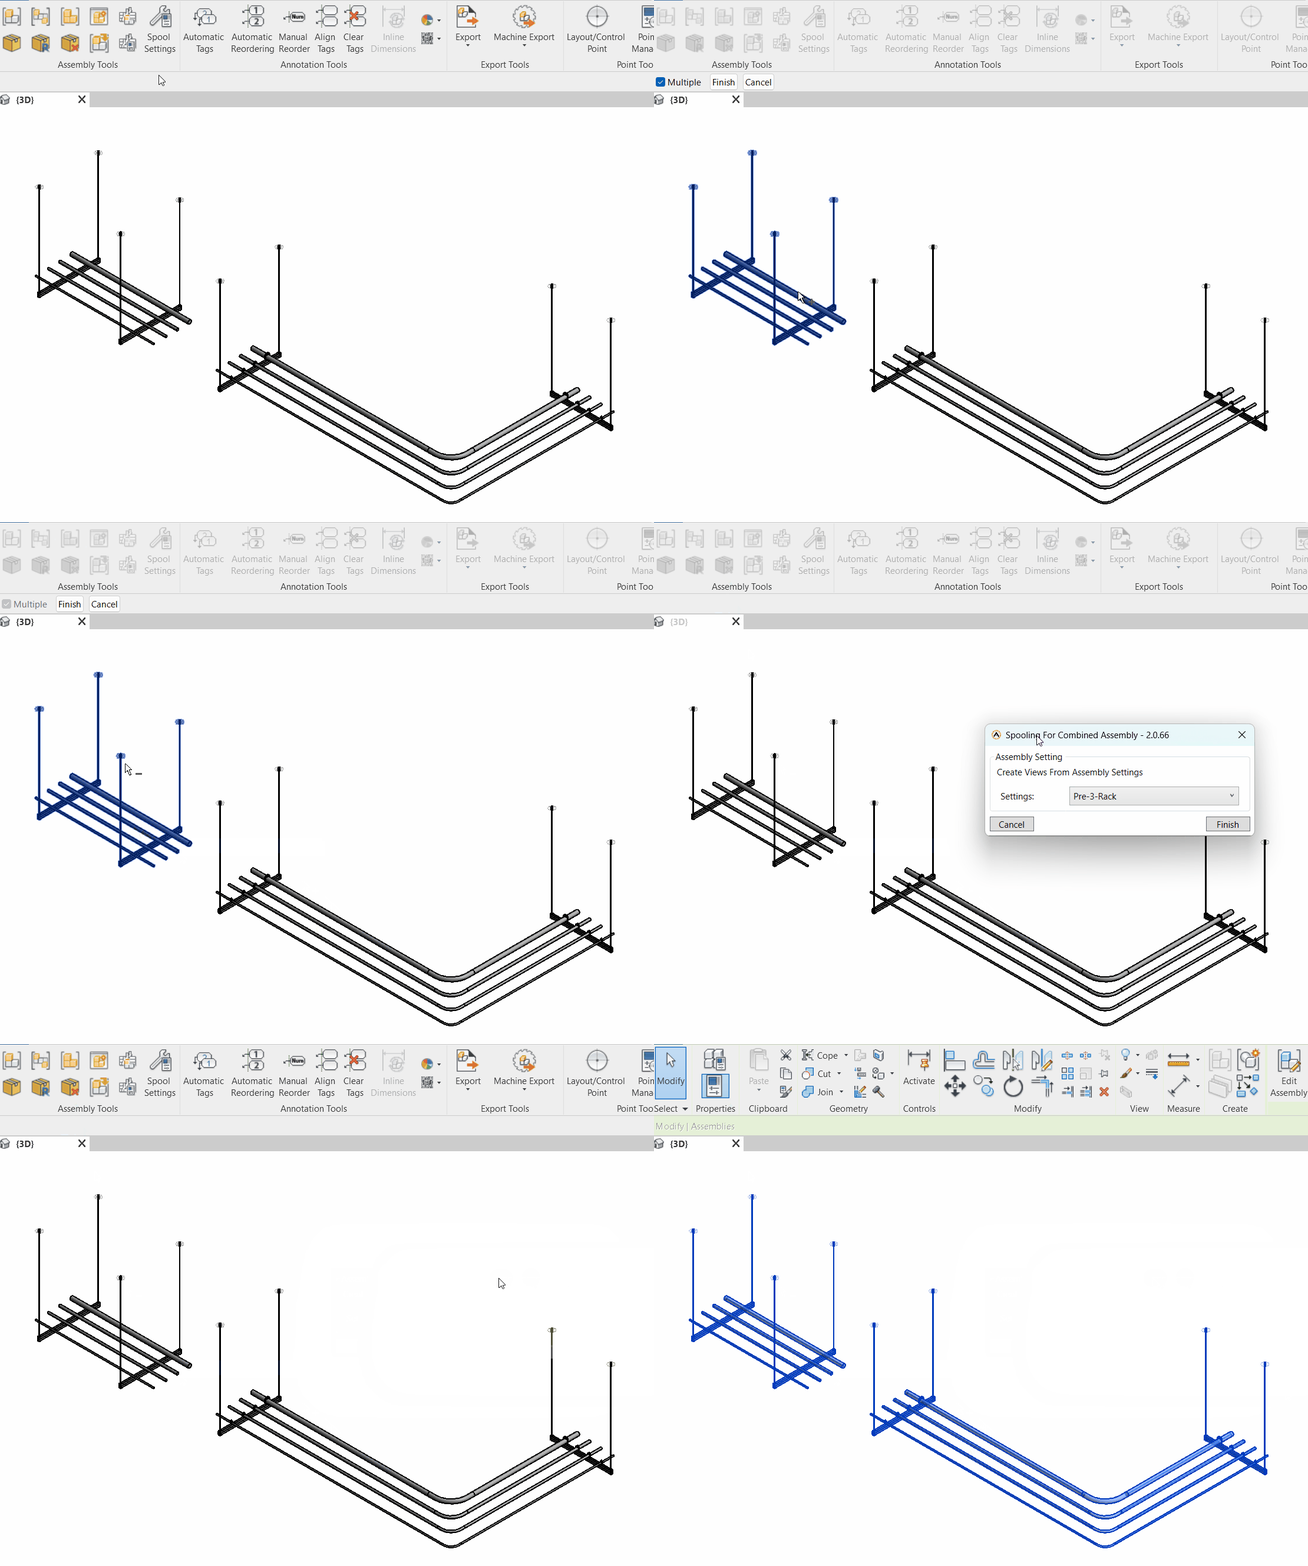
- In the assembly tools section, click on the "Combine Assembly" icon.
- Begin selecting the assemblies you want to combine.
- After you've finished selecting, click the "Finish" button.
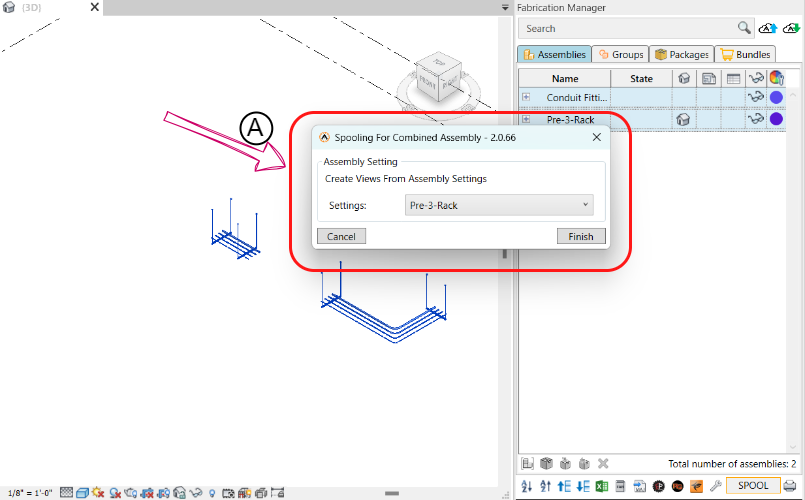
- Choose your preferred setting view (A) and click Finish.
After completing these steps, you'll observe that the previously separate assemblies have merged into a single assembly (1). When you hover over any part of this assembly, they will turn blue (2), indicating their successful combination.
Created with the Personal Edition of HelpNDoc: Powerful and User-Friendly Help Authoring Tool for Markdown Documents
