Creating an Assembly

Description
This feature enables you to generate an assembly from elements you select within the drawing area. Using the "Create Assembly" function, you can merge chosen elements in the drawing area into a single entity. This assembly can be further scheduled, tagged, and isolated to create assembly views and sheets, making it a powerful tool for organizing and presenting your project.


Why Use the Create Assembly Feature?
The Create Assembly feature offers a solution for efficiently managing complex groups of elements. Assemblies enable you to group related elements, such as window assemblies or door assemblies, streamlining the process of creation, modification, and management.
Illustrative Example
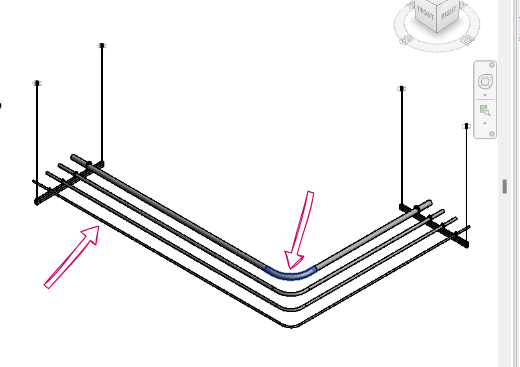
- Before utilizing the "Create Assembly" feature: in the diagram below, it's important to note that while conduits may appear interconnected in the 3D view, they are actually distinct entities.
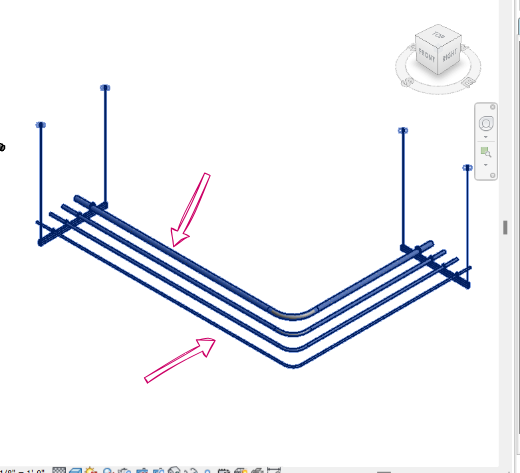
- After Using the Create Assembly Feature: Now, after using the "Create Assembly" feature, the individual conduit parts are assembled into a single group. You can confirm this by hovering over any part; they will be colored in blue.
|
Before Creating an Assembly |
After Creating an Assembly |
|
|
|
Step-by-Step Guide
- Click "Create Assembly": Click on the "Create Assembly" icon.
- Select Elements: Begin by highlighting or selecting the elements in your project that you want to include in the assembly.
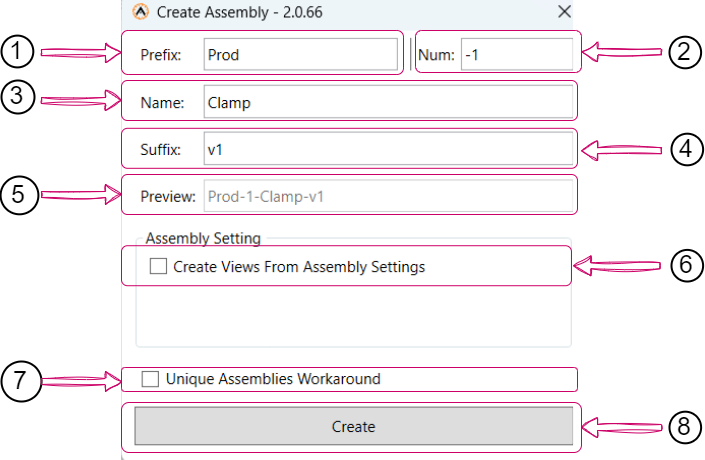
- Enter Assembly Information:
- Prefix (1): Enter the assembly's name prefix.
- Num (2): Specify the assembly number.
- Name (3): Provide a name for the assembly.
- Suffix (4): Add an assembly name suffix.
- Preview (5): Here, you can see a preview of the full assembly name.
- Assembly Views (6): Check this box to create views based on assembly settings. Select from the available assembly views and create construction views using your saved spool settings.
- Unique Assemblies Workaround (7): Choose this option if you want to create a unique assemblies workaround.
- Create Button (8): Once you've named your assembly and configured the settings, click the "Create" button to complete the assembly creation process.
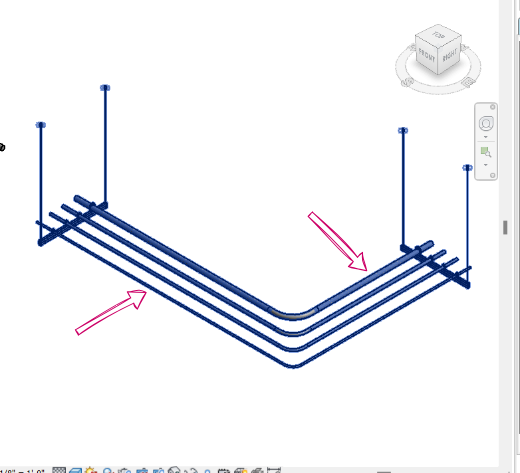
Once the assembly is created, you'll notice that when you hover over any part of the assembly, all connected components will turn blue. This blue color indicates that these parts are now part of the assembly.
Created with the Personal Edition of HelpNDoc: Benefits of a Help Authoring Tool